
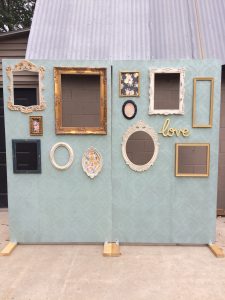
Here it is! My first post! And it’s the Photo Booth backdrop I made for my wedding!I am so happy with how this turned out, and so happy that people really enjoyed it at the reception. With the exception of the wallpapering, this project was relatively easy. I didn’t whip up any plans for this but I will try and go through the steps of how I built it as best I can.
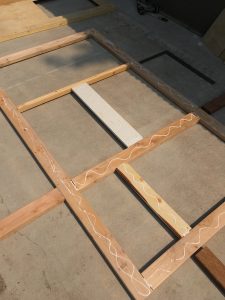
First, you’ll want to get your panels. I made this wall into two panels so that it could be transported better. I got two 4×8 sheets of plywood and cut them to 7 feet tall, only because I thought 8 feet was too tall. This makes the finished wall 8×7. Then you can make your sturdy frame out of 2x4s. Try and get a flush edge as best you can, I laid down my sheet of plywood first and arranged my 2x4s on top to get a good measuring, then I cut, drilled pocket holes, glued and assembled. You won’t be attaching the frame yet, but it is nice to have it done first so that you can use it to prop up the panels while you work on them.
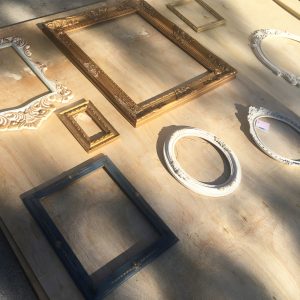
Next you play the frame arranging game. Lay both your panels out on the ground and start setting your frames down in an arrangement. Get them to where you think it looks good and balanced, and decide which frames will be cutting out. Be mindful of other props you are planning on including, for example I measured the height of my vintage sofa first to ensure that I didn’t have any frames below the sofa… that would be weird. Or if you are going to do a beadboard, plan for the height of that too. Then take a pencil and trace the inside of the frames that you will be cutting out. Another thing to keep in mind during this step is where your supports will go, you might have to move some frames around to make room for a support board.
*Tip: Take a photo of your frame arrangement, so that you can use it as a reference when you are ready to install them.
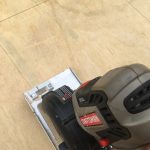
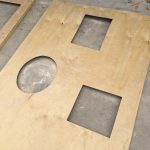
Arrange your support boards so that they avoid the holes you’ve just cut out. I fastened my boards together by drilling some pocket holes. Put some glue down on all the boards, and then lay your sheet of plywood on top of the support frame. Line up the edges, and start drilling in some carpenter screws. I used a lot of carpenter screws, maybe too many but I wanted it to be flat. The plywood is pretty thin and can warp easily, and I wanted it as straight as possible, and strong enough to hold these frames and keep our cutouts secure. Once the plywood is screwed down it is ready for wallpaper.
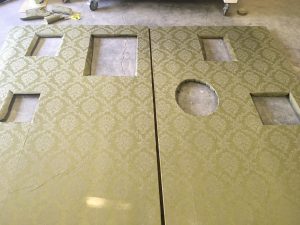 I had never applied wallpaper to anything before, so let’s just say that this part didn’t go as smoothly as I hoped it would. I found this very frustrating. Granted the wallpaper I used was old and that may have made it more difficult to work with, I’m not sure. One thing I did learn through the panels of wallpaper I wasted… was not to roll out the bubbles as you go, it ends up stretching out the material and then it won’t be square and wont line up to your board. worry about the bubbles later. I ended up with a few wrinkles in the end, but I figured, hey it adds to the vintage look of the wall. So I’m fine with it. After your wallpaper glue has dried you can cut out the openings with an exacto knife. I chose to wrap the edges around the hole and secure it with duct tape in the back, but you could cut it right up to the edge of the hole too.
*Tip: Start with the ends where the panels meet, that way you can ensure the pattern lines up.
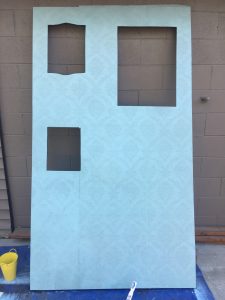
Since I found my wallpaper at a second hand store at a steal, it wasn’t EXACTLY what I was looking for, at least as far as color goes. I bought this for the texture. So I painted on top of it, obviously this step is optional. I mixed some wall paint with glaze and it turned out really nice, you can still see the texture.
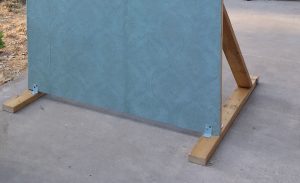
For the ground supports I cut the bottom board to 4 feet, and have about 10-12 inches sticking out to the front. I secured these to the panel with a small metal bracket on both the front and the back and took another 2×4 with 45 degree angle cuts on each end and screwed those to the side of the panel and the grounded 2×4. I eyeballed this, it didn’t need to be perfect. I did need some help with this step, I had someone hold up the panel while I affixed the brackets and the 2×4.
Now time to fasten the frames. I used gorilla glue and clamps and then some small screws in the back. I bought several different sizes of screws because the thickness of my frames varied a lot. I screwed them from the back side into the front of the frame so that they would be hidden. Be careful of the glue dripping down. I had that happen on a couple and it dried all glossy, that’s the one regret I have on this project.
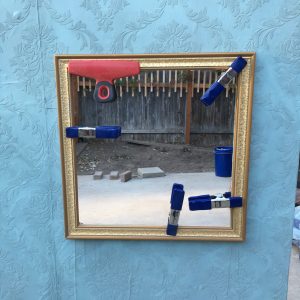
For the frames that were not a cut out, I chose a mix of leaving them empty and using various patterned scrapbook paper. I was originally going to use old photographs but I liked this idea better. I found my frames at a mixture of places: antique stores, flea markets, Michaels, and Hobby Lobby.


I had originally planned on buying a latch to fasten on the back that would tighten the two panels together for a more seamless look, but since I was working on this til the week before the wedding…I ran out of time.
But that’s it! This really wasn’t a difficult project at all, I would do maybe one or two things differently but overall I’m so happy with how it turned out.
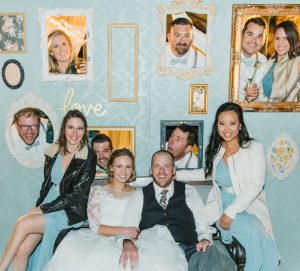
And here she is! Live and in use at the reception! This was so much fun to have at a wedding. You can hire a professional photo booth service if you want, and they can use your background. We looked into that but opted to go without. Most people just took their own photos with it, and our photographer took some too.
One thing to note about these photos with the bridal party, YES the panels are backwards from how I designed it, but it works this way too and I’m sure I’m the only one that noticed. But the panels got moved halfway throughout the night, and in the process rearranged. Oh well. Still looks great!
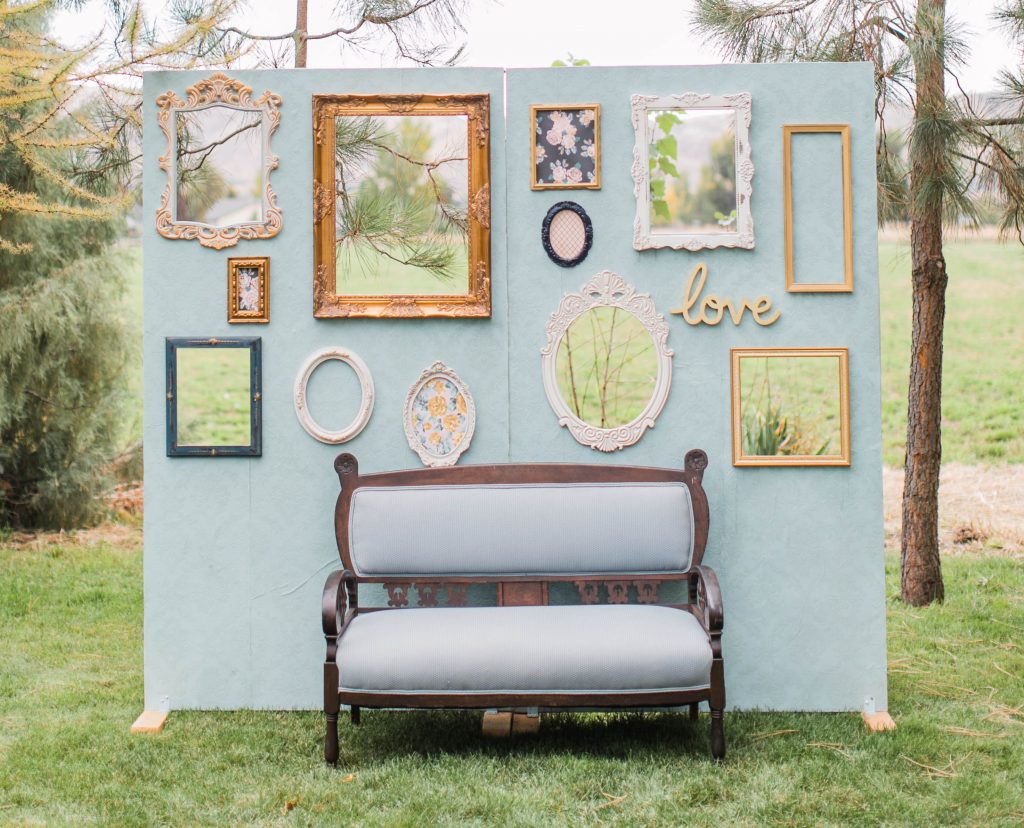
Photo by let it shine photography
1 comment
This is amazing!
Comments are closed.